Tuesday, February 24, 2015

Burgundy Beef and Vegetable Stew

    A few weeks ago, I attempted a similar recipe in my slow cooker. I wasn't a fan. I did a few things different this time. For instance, instead of using the already cut up stew meat, I bought a whole roast and cubed it up myself. I also used a different kind of red wine this time. One that's made for cooking and not for drinking. Even though the Merlot that I used last time came in handy for drinking after I tasted my creation and wasn't impressed! But, most importantly, I didn't cook it in the slow cooker. It was so bad, I decided to cook it completely different! I must say, I was really impressed with the recipe this time around! It's reallyyyy good!


Burgundy Beef and Vegetable Stew
Ingredients:
- 1 and 1/2 pound beef eye round, cut into 1 inch pieces
- 1 tablespoon of vegetable oil
- 1 teaspoon of dried thyme leaves
- 1/2 teaspoon of salt
- 1/2 teaspoon of pepper
- 2 (14.5 ounce) cans of beef broth
- 1/2 cup of Burgundy wine
- 1/2 tablespoon of minced garlic
- 1 and 1/2 cup of baby carrots
- 1/2 of a medium sized onion, cut into chunks
- 2 tablespoons of cornstarch, dissolved in 2 tablespoons of water (a slurry)
- 1 (8 ounce) package of fresh or frozen sugar snap peas 
    In a large pot with a lid, heat the vegetable oil over medium-high heat until hot. Add the beef and brown evenly, stirring occasionally. Pour off the drippings. Return to heat, season with the thyme, salt, and pepper. Stir in the broth, wine, and garlic. Cover, bring to a boil, reduce the heat to low, and simmer for an hour. Add the carrots and onions, cover and cook for 30 minutes. Stir in the cornstarch mixture, stir and bring to a boil. Stir in the sugar snap peas and cook for a few more minutes, until snap peas are tender. 

Sunday, February 22, 2015

Soft Serve Peanut Butter Banana Ice Cream

    So, I kind of want to eat this for breakfast everyday. Earlier this week, I sliced up some bananas and put them in the freezer with every intention of making my ice cream creation that night. Needless to say, it got really cold this week! Record lows for Florida and we were in deep freeze for 11 hours on Thursday night! That doesn't happen all the time. So, three days later. I'm loving that the sun is shining and it's in the 70's today! Despite the weather, this is a great snack for the kids after school or even a healthy breakfast.  Or, in my case, to ease a slight hangover. But most importantly, it's freaking delicious!


Soft Serve Peanut Butter Banana Ice Cream
Ingredients:
- 2 good sized bananas, sliced and frozen for several hours
- 1 and 1/2 tablespoons of creamy peanut butter
- 1 tablespoon of plain yogurt
- 1 tablespoon of milk
- 1/2 teaspoon of vanilla extract
    It's pretty easy. Just put all of the ingredients in a food processor and blend the crap out of it. If it's too thin for your taste, stick it in the freezer for a bit. I topped mine with mini m&m's.


I may have been singing Gwen Stefani
while it was blending.


Friday, February 20, 2015

Garlic Parmesan Spaghetti Squash

    I remember my mom making spaghetti squash growing up. I was always a picky eater when it came to vegetables. So, I would hear the word squash and it was all over. Nope. Not having it. Now that I'm getting older, I've discovered that there are so many things that I've been missing out on. One of those things is definitely spaghetti squash! 


Garlic Parmesan Spaghetti Squash
Ingredients:
- 1 medium sized spaghetti squash
- olive oil
- salt and pepper
- 1/4 cup of water
- 4 tablespoons of butter
- 1/2 tablespoon of minced garlic
- 1/2 teaspoon of ground white pepper
- 1/2 teaspoon of basil
- 1/2 cup of shredded parmesan cheese
    Slice the squash in half and remove the seeds. Drizzle the inside with olive oil and sprinkle with salt and pepper. Place it in a microwave safe dish, sliced side down, with 1/4 cup of water in the bottom. Microwave, covered, on high for 15 minutes. In a medium sized pan, melt the butter and add the garlic, white pepper, and basil. When the squash has finished, take a fork and scoop out the spaghetti-like flesh of the squash and add to the butter mixture. Saute for a few minutes, add more butter if you think it needs it. Then, mix in the parmesan cheese and enjoy.


Tuesday, February 17, 2015

Blueberry Croissant Bake

    Today was a really icky rainy Florida morning. Don't get me wrong, it was in the 60's and it's mid-February so, I'm not complaining too much. But, I decided to make breakfast before embarking on my double shift at the Olive Garden. I love this recipe. French style croissants, creamy custard-like filling, and blueberries make the perfect breakfast, or dessert even! It kind of reminds me of the baked french toast that I made for Christmas, but better. My mom snuck a piece before I rushed out the door and when I got to work, I shared with a couple of co-workers. It definitely brightened our otherwise dreary, rainy day. 

 
Blueberry Croissant Bake
Ingredients:
- 4 or 5 medium sized french style croissants, cubed (5-5 1/2 cups) found in the bakery section of your supermarket
- 1 and 1/2 cups of fresh or frozen blueberries
- 1 (8 ounce) package of cream cheese, softened
- 2 eggs
- 3/4 cup of sugar
- 1 teaspoon of vanilla extract
- 1 cup of milk
- confectioners sugar for dusting
    Preheat oven to 350 degrees. Spray a 9x9 baking dish with non-stick cooking spray. Evenly distribute the croissant pieces in the baking dish and spread the blueberries on top. In a medium bowl, with an electric mixer, beat together the cream cheese, eggs, sugar, and vanilla. Gradually add in the milk and then pour mixture over the croissants and blueberries. Let sit for about 15 minutes and then bake for about 35- 40 minutes. Bake until golden brown and the center has set. Dust with confectioners sugar. I served it warm out of the oven, I'm sure it is great served chilled as well. 


Saturday, February 14, 2015

Peanut Butter Chocolate Cookie Bars

    You can't go wrong where peanut butter and chocolate are concerned! Here's a quick and easy idea for a semi-homemade dessert!


Peanut Butter Chocolate Cookie Bars
Ingredients:
- 1 (18 ounce) package of refrigerated chocolate chip cookie dough
- 3 cups of confectioners sugar
- 1 cup of peanut butter
- 2 tablespoons of butter, softened
- 1/4 cup of water
- 1 cup of milk chocolate chips
    Preheat oven to 350 degrees. Press cookie dough into the bottom of a 9 inch square baking pan. Bake for 16-20 minutes, or until golden brown. Let cool for 15 minutes. In a medium bowl, combine the confectioners sugar, peanut butter, butter, and water. Mix well, until creamy. Spoon the peanut butter mixture and smooth evenly on top of the baked cookie crust. Melt the chocolate chips in the microwave in 30 second intervals, until completely melted. Pour melted chocolate on top of the peanut butter layer. Refrigerate for an hour and cut into bars.  

Monday, February 9, 2015

Chocolate Covered Cherries

Perfect sweet treats!
Make ahead for Valentine's Day!


Chocolate Covered Cherries
Ingredients:
- 1 tablespoon of butter, softened
- 1 tablespoon of light corn syrup
- 2/3 cup of confectioners sugar
- about 20 maraschino cherries, with stems
- 1 (8 ounce) package of chocolate candy melts (or chocolate of your choice)
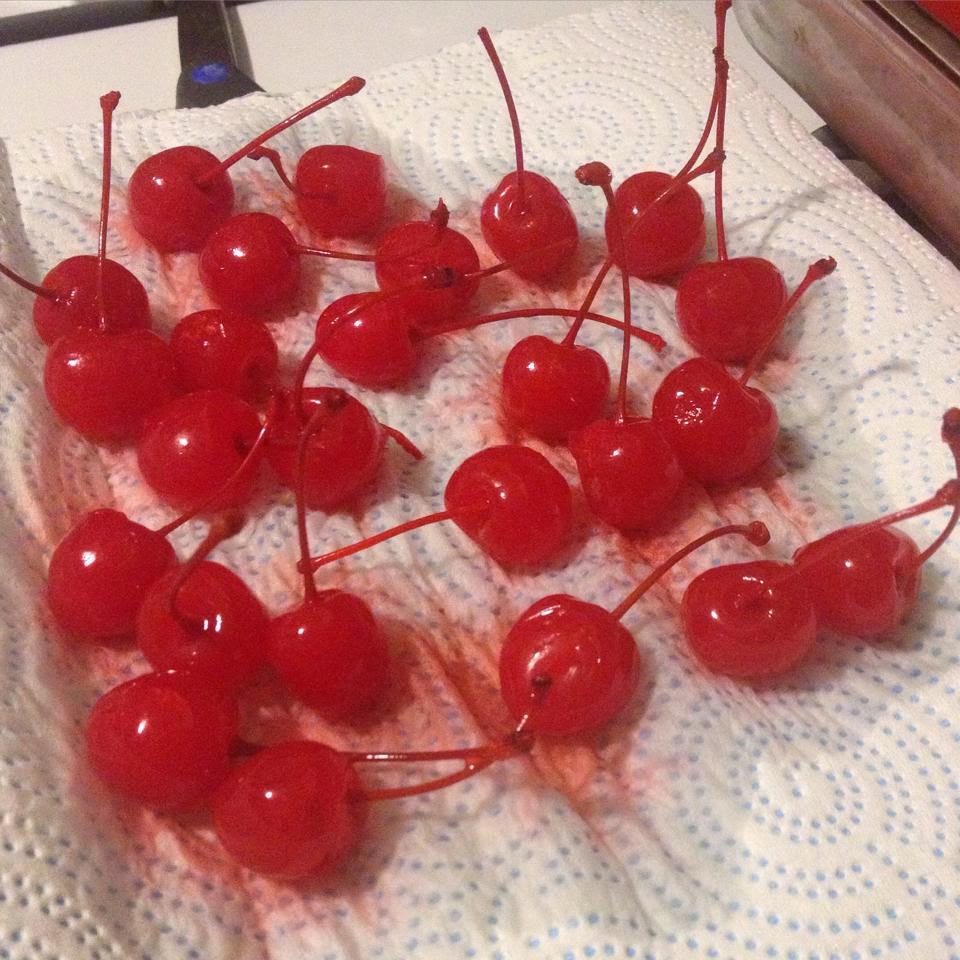
    Drain the cherries and place them on a paper towel and let dry for several hours. In a bowl, mix together the butter and corn syrup. Sift in the confectioners sugar. Cover each cherry with about 1/2 teaspoon of sugar mixture by molding it like clay. Let sit in the refrigerator for about 30 minutes. Melt the chocolate melts according to package. Carefully dip each covered cherry in chocolate and place on a wax papered surface. If it's cool outside, let them sit out to stiffen. Or, put them in the fridge to set. They are best if they've been made at least a week ahead of time. Store them in an air tight container until you're ready to eat. 


This is what the sugar mixture should look like.


Butterfinger Candy

    It's Valentine's week already! Butterfinger candy bars are soooooo good. I bet you didn't know that you could make a similar treat at home in your microwave. Usually candy corn is obviously orange so this would be a cute idea for Halloween too. I can see myself cutting out little pumpkins already. But, it's Valentine's and I found pink and red candy corn, score! Get creative and have fun with them!


Butterfinger Candy
Ingredients:
- 1 pound of candy corn
- 2 cups of creamy peanut butter
- 2 (8 ounce) packages of candy melts, whatever colors you'd like
- sprinkles
    Line a 9x13 inch baking pan with tin foil, I like to spray it lightly with non-stick spray as well. Pour the candy corn into a medium sized microwave safe bowl. Heat on high for 1 minute. Remove and stir. Microwave on high in 30 second intervals until they are completely melted and smooth. Stir in the peanut butter. You can place back in the microwave if it starts to get too hard while stirring. This may take some muscles and patience. Once the mixture is combined, pour into prepared dish and flatten with a spatula or clean hands. Let cool in the refrigerator for an hour. Cut into desired shapes. Melt candy melts according to the directions and decorate!